DIY Witch’s Broom
Hocus Pocus is my all-time favorite seasonal movie! Once I came to this realization, I was desperate to craft something witchy for my Halloween costume this year. Since anyone who has seen the magical movie knows it’s easy to lose track of a broomstick, I figured I’d do a little DIY breakdown of how the Sanderson sisters could have whipped up a few replacement brooms with the help of their local Goodwill. I mean, since they could conjure a potion of eternal youth and lure in all the children of Salem with just a song, I’m pretty sure they could tackle a simple craft project like this! Here’s how…
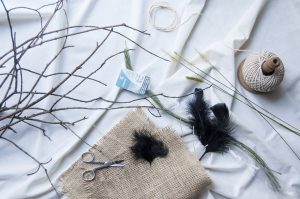
Materials
- Thrifted broom (any size, shape, and style should do!)
- Foraged twigs, grass, etc.
- Feathers
- Burlap
- Stem wire
- Twine
- Hot glue and glue gun
- Scissors
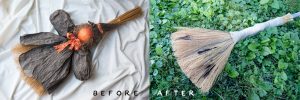
As I browsed through Goodwill’s aisles, I actually found a few different harvest-style decorative pieces that would have worked as the bristles of my witch’s broom, but I decided to choose the one that looked the most dated. This little witch was probably super cute when it was first made, but man oh man did it need some love by the time I stumbled upon it. Once I had that for the foundation piece, I hit the hills for some twigs and Earthy remnants to make it look authentically historical.
Step 1: Remove any non-magical bits on your thrifted broom base. An elimination spell should work here, but so would some good old fashioned scissors. I had to remove all of the tissue paper and ribbon which came off fairly easily. There were a few little pieces of the Styrofoam head and the tissue around it that I couldn’t get off, but the burlap binding I added later covered it right up.
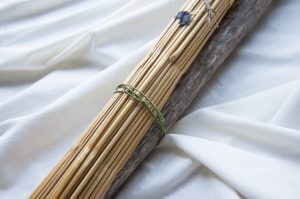
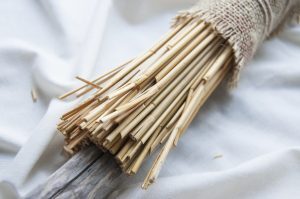
Step 2: Get the right broom handle. If your broom already has a long handle, you could certainly leave it as is. I liked that the broom I decided on was short enough for me to add my own handle. I knew I wanted a truly rustic look and out near my shed I spotted a walking stick that my husband had peeled the bark off of to use on a hike. It was perfect! Any old stick would work, though. Look for something gnarled or knobby for a wicked witchy feel. To attach it, carefully nestle it down inside the bristles of the broom (if that’s possible to do without damaging the straw) then wrap it several times with stem wire. My bristles were brittle and probably wouldn’t have handled that well, so I just set the broom head on top of the stick then wrapped it tightly. Step four will further secure the two pieces.
If you are using a regular broom and want to add a little extra personality to the handle, you could try sanding off any finish or adding big globs of hot glue to look like knots in the wood then spray painting the whole handle so it looks uniform.
Step 3: Add a little whimsy! Carefully tuck foraged twigs, hay, and feathers into the broom head and dab on a little hot glue in a well-hidden place to help them stay. For the longer pieces, you can tuck them up under the first stem wire that attaches the broom stick. You could even add a little glitter here, too, if that’s your style!
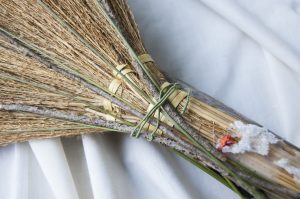
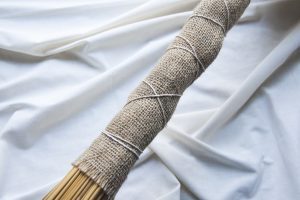
Step 4: Cover up the seams. I wrapped all of the ugly parts (the leftover Styrofoam, the stem wire, and the ends of the twigs) tightly with a piece of burlap hot gluing it all the way up its seam. Once that was in place, I added twine. This was partially done as an extra way to hold everything together, but it’s also visually breaks up the look of the burlap. A satin or velvet ribbon would look lovely, too, if “classy witch” is more what you’re going for.
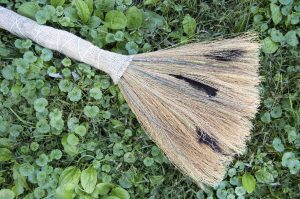
Step 5: Give it a little wear and tear. I felt like the straight edge at the top of my bristles was a little too tidy for my witch’s broom, so I went to work trimming and bending the straw randomly to show some use.
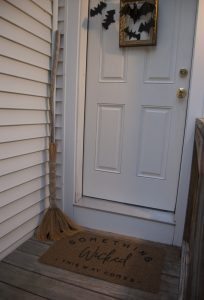
And there you have it! Bring that baby outside and give it a test drive around the neighborhood to get yourself ready for Halloween. With my broomstick finished, now I’ll be tracking down a cape and corset to round out the rest of my costume.
By the way, I’m still looking for a couple of volunteers to the be Winifred and Sarah to my Mary Sanderson. If that sounds like you, head to Goodwill for costume supplies where your purchase allows Goodwill organizations to help people who are facing challenges to finding employment overcome their hardships and achieve independence through the power of work. Supporting that cause is a great way to balance out your karma since, in a costume like this, you’ll likely spend Halloween running amok!


