
DIY Cardboard Gingerbread House
Capture hearts with this one-of-a-kind cardboard gingerbread house! This simple craft makes great use of those cardboard boxes laying around from Cyber Monday or early Christmas purchases. Try it for yourself or get the kids involved for some artistic holiday fun. Better yet, host a decorating competition with your family, but minus the mess of icing, candy, and crumbs! Follow along to repurpose your cardboard boxes into something worthy of making it on the mantle.

Materials needed:
1-2 cardboard boxes
A box cutter
White and red puffy paint (or your colors of choice!)
1 Sharpie or marker
Cotton balls
1 small battery-operated candle
A hot glue gun
Hot glue sticks
Gingerbread house template (at the bottom!)

Step 1:
To get started, you’ll first need to print out the gingerbread house template provided at the bottom of this article. Once printed, cut out the insides of the template and use the remains to trace an outline on your broken-down cardboard boxes.


Step 2:
Now that we’ve outlined our cardboard boxes, cut alongside the outline to form the six pieces we need to construct our gingerbread house.

Step 3:
Time to turn this drab cardboard gingerbread house into something fab! Pull out your white and red puffy paint and begin adding embellishments onto the cut-out cardboard pieces. Be as creative as you’d like! We kept a more traditional look but try using different colors or design patterns to really make this your own! Allow time for the paint to dry before moving on.


Step 4:
*Optional* Print out a miniature door and windowpane to cut and tape to the inside of your house! This extra step will help bring even more life to your cardboard gingerbread house. To do so, first go back with your box cutter and cut out a small square for where you’d like to place your window.

Step 5:
Let construction commence! One by one, carefully hot glue the cardboard pieces together to form our house. While doing so, you may need to apply light pressure to ensure the pieces are strongly attached to one another.


Step 6:
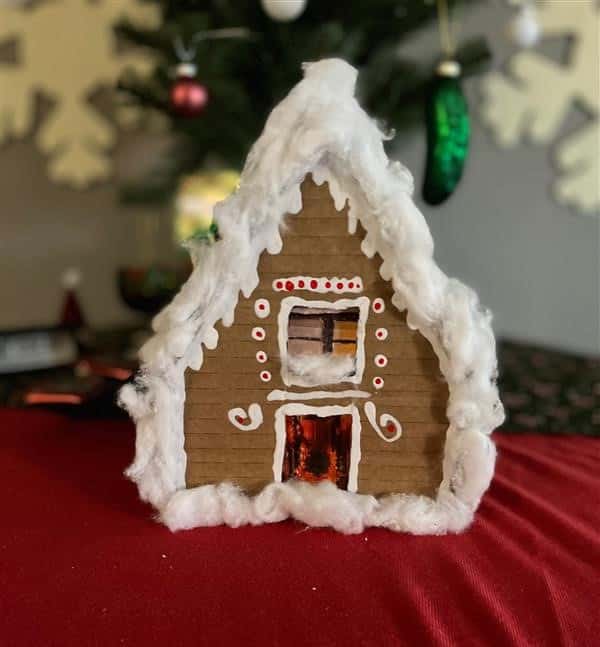
Now our cardboard gingerbread house is all put together, but there is still one final touch left for this to be the cutest house on the block. Grab your cotton balls, pull them apart some, and hot glue the cotton around the seams of your house. This adds a snowy effect to our house, while also doubling as a cover-up for any imperfections that might’ve been showing! To finish, switch on your small battery-operated candle and place inside the house.


One of the best parts about this craft is its low cost and easily accessible materials, so the fun doesn’t have to stop here. If you have enough cardboard leftover, repeat the steps above and you’ll have yourself a merry little Christmas village!

Another added bonus of this DIY is you will never have to worry about your gingerbread house going stale, bringing bugs, or falling apart. After the holidays pass, tuck it away until next year, or come back here and create a fresh new look!
Gingerbread House Template


